This Quickstart provides you with the know-how to install and work with the RTOS Board Support Package (BSP) for the phyCORE-AM572x Rapid Development Kit (RDK). This Quickstart shows you how to do everything from installing the appropriate tools and source, to creating RTOS projects and debugging them through JTAG. Please refer to the phyCORE-AM572x Hardware Manual for specific information on board-level features such as jumper configuration, memory mapping and pin layout for the phyCORE-AM572x System on Module (SOM) and baseboard. Additionally, gain access to the SOM and baseboard schematics for the phyCORE-AM57x Rapid Development Kit by submitting a Request for Schematic Files from the PHYTEC Service Desk. Sign up or login here: PHYTEC Support Portal.
Requirements
The following system requirements are necessary to successfully complete this Quickstart. Deviations from these requirements may suffice, or may have other workarounds.
Hardware
- phyCORE-AM572x System on Module (PCM-057)
- phyCORE-AM572x Baseboard (PCM-948)
- Serial cable (RS-232)
- JTAG Emulator (Spectrum Digital XDS200 USB JTAG Emulator is used in this Quickstart)
AC adapter supplying 12VDC / min. 2A
- 1GB or larger SD Card
- SD card reader operational under Linux
- If you do not have SD card access under Linux then interacting with the board will only be possible through the JTAG interface.
- If you do not have SD card access under Linux then interacting with the board will only be possible through the JTAG interface.
Software
- A modern GNU/Linux Operating host system either natively or via a virtual machine:
- Ubuntu 16.04 LTS recommended, 64-bit required. Other distributions will likely work, please note that some setup information as well as OS-specific commands and paths may differ.
- If using a virtual machine, VMWare Workstation, VMWare Player, and VirtualBox are all viable solutions.
- Ubuntu 16.04 LTS recommended, 64-bit required. Other distributions will likely work, please note that some setup information as well as OS-specific commands and paths may differ.
- Root access to your Linux Host PC. Some commands in the Quickstart will not work if you don’t have sudo access (ex. package installation, formatting SD card).
- At least 50GB of free storage space if building BSP from source or 15GB if using pre-built BSP.
- Active Internet connection.
Development Host Setup
Install Host Debian Packages
Installing the RTOS BSP requires certain packages to be installed. Run the following command to ensure you have the packages installed:
sudo apt-get install libc6:i386 mono-runtime wget
Above is the recommended package installation for following this Quickstart on a Ubuntu 16.04 LTS Linux distribution. The names of the packages that provide the required software and libraries may differ in other Linux distributions.
Create an Install Directory
Run these commands to create a directory which will house your RTOS BSP. In this Quickstart, the PHYTEC base directory is /opt/PHYTEC_BSPs and the RTOS BSP directory is /opt/PHYTEC_BSPs/rtos_ti/install. This RTOS BSP directory is not a hard requirement, so feel free to modify the following commands to suit your needs.
sudo mkdir -p /opt/PHYTEC_BSPs

# In the following command, replace <user> with your host's username
sudo chown -R <user>:<user> /opt/PHYTEC_BSPs

mkdir -p /opt/PHYTEC_BSPs/rtos_ti/install
cd /opt/PHYTEC_BSPs/rtos_ti/install
export RTOS_INSTALL_ROOT=`pwd`
$RTOS_INSTALL_ROOT is referenced throughout this document. If you use a different directory instead of what is here, be sure to configure this variable accordingly.
Get Started With the Pre-Built RTOS BSP
This section is intended to walk you through the steps required to retrieve, extract, and start working with the pre-built RTOS BSP.
If you made it this far without first visiting and following the information provided in the Requirements and Development Host Setup sections, please follow those links and return when your configuration meets the requirements and your environment is ready.
Connector Interfaces
Use the following as a reference for the connector interfaces on the phyCORE-AM572x Rapid Development Kit that will be used in this Quickstart:

Retrieve and Extract the Pre-Built RTOS BSP
Run these commands to download and extract the pre-built RTOS BSP:
wget http://artifactory.phytec.com/artifactory/am57xx-images-released-public/BSP-RTOS-TI-AM57x-PD17.1.1.tar.bz2
tar -jxf BSP-RTOS-TI-AM57x-PD17.1.1.tar.bz2 -C $RTOS_INSTALL_ROOT
Optional command to free up disk space:
rm -f BSP-RTOS-TI-AM57x-PD17.1.1.tar.bz2
Install Code Composer Studio
Code Composer Studio (CCS) is an Eclipse-based integrated development environment (IDE) offered by Texas Instruments for TI embedded processors. The recommended CCS version for this RTOS BSP is 7.2.0. Run these commands to download and install CCS:
cd $RTOS_INSTALL_ROOT
wget http://software-dl.ti.com/ccs/esd/CCSv7/CCS_7_2_0/exports/CCS7.2.0.00013_web_linux-x64.tar.gz
mkdir ccs_temp
tar -xf CCS7.2.0.00013_web_linux-x64.tar.gz -C ccs_temp
./ccs_temp/ccs_setup_linux64_7.2.0.00013.bin
The above CCS installer downloads only selected components during the install. If you would like to frontload the download process, use the following 'wget' command and adjust the above commands to reflect the change in filename:
wget http://software-dl.ti.com/ccs/esd/CCSv7/CCS_7_2_0/exports/CCS7.2.0.00013_linux-x64.tar.gz
Proceed through the CCS installer while following these instructions at the pertinent stages:
Input /opt/PHYTEC_BSPs/rtos_ti/install in Choose Installation Location:

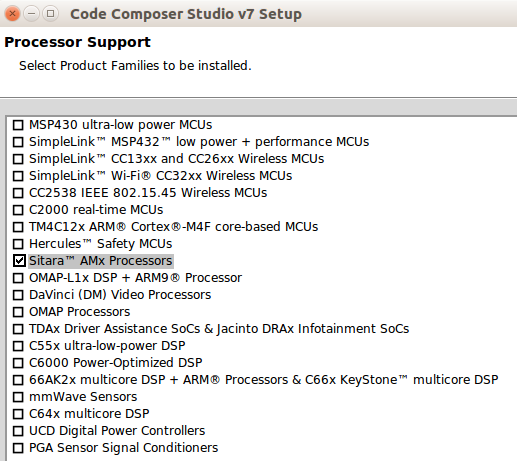
Select Sitara AMx Processors in Processor Support:
Select additional JTAG/Debug Probes, if applicable, in Select Debug Probes:

After the install is complete, run the following commands:
sudo $RTOS_INSTALL_ROOT/ccsv7/install_scripts/install_drivers.sh
rm -rf ccs_temp/
If you installed CCS into a directory other than the one recommended above, you must change the path in the above command to reflect your CCS directory.
Optional command to free up disk space:
rm -f CCS7.2.0.00013_web_linux-x64.tar.gz
Install Code Composer Studio Configuration Files
PHYTEC provides files to help ease the CCS configuration process when targeting the phyCORE-AM57x RDK. Run these commands to install these files for use with CCS:
cd $RTOS_INSTALL_ROOT/PHYTEC
cp -f am572x_phycore_rdk.xml $RTOS_INSTALL_ROOT/ccsv7/ccs_base/common/targetdb/boards/
cd $RTOS_INSTALL_ROOT/PHYTEC/gel/
cp -rf am572x_phycore_rdk $RTOS_INSTALL_ROOT/ccsv7/ccs_base/emulation/boards/
If you installed CCS into a directory other than the one recommended above, you must change the path in the above command to reflect your CCS directory.
Prepare SD Card for Boot
We recommend that you use an SD card populated with the RTOS BSP secondary bootloader (SBL) so that the phyCORE-AM572x RDK hardware is configured (pinmux, clocks, etc.) by the RTOS board support library.
You can connect to the phyCORE-AM572x in CCS through JTAG after the initial hardware configuration has been handled by another bootloader, like U-Boot, but your hardware and software may behave in unexpected ways.
The RTOS BSP includes a script that will format an SD card and copy the pre-compiled SBL to the formatted SD card. To format and populate an SD card, run these commands:
cd $RTOS_INSTALL_ROOT/processor_sdk_rtos_am57xx_4_01_00_06/bin
sudo ./create-sdcard.sh $RTOS_INSTALL_ROOT/pdk_am57xx_1_0_8/packages/ti/boot/sbl/binary/am572x_phycore_rdk/mmcsd/bin
After you execute the last command, you will be prompted to select the device number that represents the SD card you would like to format. Please make sure that you select this device number carefully as data on the target device will be destroyed. After the SD card has been formatted and populated, you should insert the SD card into the phyCORE-AM572x carrier board SD card slot and power on the device.
If you would like to add a small suite of interface diagnostic applications to the SD card, run these commands with your formatted SD card mounted on your PC:
cd $RTOS_INSTALL_ROOT/pdk_am57xx_1_0_8/packages

# set up the environment for building the diagnostic applications
source pdksetupenv.sh

cd $RTOS_INSTALL_ROOT/pdk_am57xx_1_0_8/packages/ti/board/diag
make am572x_phycore_rdk_sd
cd $RTOS_INSTALL_ROOT/pdk_am57xx_1_0_8/packages/ti/board/bin/am572x_phycore_rdk/sd

# In the following command, replace <user> with your host's username
cp * /media/<user>/boot/
sync
Create a Simple Code Composer Studio Project
You will now create a simple CCS project to test your JTAG connection to the phyCORE-AM572x RDK.
Start CCS by clicking its desktop icon or by running ccstudio from the eclipse subdirectory of the CCS install directory. After CCS starts, you will be prompted to select a directory as workspace; feel free to select any convenient directory as your workspace. If CCS notifies you that it has detected new products, select and install all of the detected products. These detected products are components of the RTOS BSP that must be installed before they can be used in CCS projects.
Create a new CCS Project: from the drop-down menu, click File → New CCS Project
In the New CCS Project window:
Set Target to AM572x - Cortex A15 and the secondary Target field to AM572X_PHYCORE_RDK.
If AM572X_PHYCORE_RDK isn't a selectable option in the secondary Target field, it is likely that the am572x_phycore_rdk.xml file was not correctly installed in the Install CCS Configuration Files step. Please review this step and try again after restarting CCS.
- Set Connection to Texas Instruments XDS2xx USB Debug Probe.
- Click the Cortex A [ARM] tab and set your project name to hello_world.
- Under Advanced Settings, set Linker command file to AM572x.lds.
- Under Project templates and examples, select Hello World from the Basic Examples section.
Your New CCS Project window should now look similar to this screenshot:
- Click Finish.
Build and Debug the Simple Code Composer Studio Project
Building and debugging this simple CCS project is a relatively easy process. Follow these steps to ensure your build environment is set up correctly and that you are able to debug your project through the JTAG interface.
Open the Project Explorer window: from the drop-down menu, click View → Project Explorer
In the Project Explorer window:
Ensure that you have a target configuration file in your project set to Active/Default. If you followed the steps in the Create a Simple Code Composer Studio Project section, this file (AM572X_PHYCORE_RDK.ccxml by default) and setting will be created for you.
To create a target configuration file manually, right click the hello_world project name in the Project Explorer window and click New → Target Configuration File. Select AM572X_PHYCORE_RDK in the Board or Device list and click Save under Save Configuration.
Due to a bug in the Sitara Device Support package installed with the recommended version of CCS, you will likely need to modify the target configuration file before your project will build. To do so, open the target configuration file (AM572X_PHYCORE_RDK.ccxml by default) from your Project Explorer window. Click the Advanced tab at the bottom of the Target Configuration window. Note that the third and fourth ICECrusherCS entries have duplicate names. Rename the third ICECrusherCS entry to ICECrusherCS_2 and the fourth ICECrusherCS entry to ICECrusherCS_3 and save the target configuration.
- Open your project's target configuration file from the Project Explorer window.
In the target configuration file window:
- Under the General Setup field, select your JTAG device in the Connection drop-down. For the Spectrum Digital XDS200 USB JTAG Emulator, the correct option is Texas Instruments XDS2xx USB Debug Probe.
- Save the target configuration file by clicking Save in the Save Configuration field. You must save the target configuration file before testing the JTAG connection in the following step.
- Make sure that your board is powered on and that you have connected your JTAG device to the JTAG pins on the phyCORE-AM572x RDK carrier board. Click Test Connection in the Test Connection field. If you have configured your device and project correctly, you should see a result similar to this screenshot:

In the Project Explorer window:
- Set your target configuration file to be the active and default target configuration by right clicking the target configuration file in the Project Explorer window and selecting Set as Active Target Configuration as well as Set as Default Target Configuration.
- Right click your hello_world project and select Build Project.
- After the project is done building, right click your hello_world project and select Debug As → Code Composer Debug Session.
In the Launching Debug Session window:
- Click Deselect All.
- Select Texas Instruments XDS2xx USB Debug Probe/CortexA15_0. Your Launching Debug Session window should now look similar to the following screenshot:

- Click OK. CCS will now automatically connect to the first core of the ARM Cortex-A15 processor on the phyCORE-AM572x RDK through the JTAG port, configure the hardware using the GEL files, load the hello_world program into memory, and run the hello_world program from memory.
In the main CCS window:
- If all of the previous steps have been followed correctly, the hello_world program will be paused at an automatically generated breakpoint at line 7 of hello.c. Click the Resume button located in the top toolbar.
- You should see "[CortexA15_0] Hello World!" in the Console window just like this screenshot:

Generate Example Code Composer Studio Projects
Included with this RTOS BSP is a number of configuration files that can be used to generate importable CCS projects for reference and interface testing. This section will explain how to generate and import these CCS projects.
Generate Example Projects
The Platform Development Kit (PDK) provides a script to search through the PDK and generate importable CCS projects if it finds configuration files that match the arguments given to the script. Run these commands to generate these projects:
cd $RTOS_INSTALL_ROOT/pdk_am57xx_1_0_8/packages

# set up the environment for searching through the PDK and generating the projects
source pdksetupenv.sh

./pdkProjectCreate.sh AM572x am572x_phycore_rdk little all all arm
The above command looks for projects that use the AM572x SOC, the am572x_phycore_rdk board, little Endian byte sequencing, all PDK submodules, al project types, and the Cortex-A15 processor. If you would like to look for projects that target the C66x DSP, change arm to dsp. For the Cortex-M4 processor, change arm to m4. Note that the offered example projects will depend on release and testing.
Within your current directory you should now have a new subdirectory called MyExampleProjects that contains an additional subdirectory for each found configuration file that matches the arguments given to the pdkProjectCreate.sh script.
Import and Configure Example Projects
To import the example projects, start by opening CCS.
In the main CCS window:
- From the drop-down menu, click File → Import...
- In the Import window, expand Code Composer Studio and select CCS Projects, and click Next.
- In the Import CCS Eclipse Projects window, click the Select search-directory radial button and click Browse next to the Select search-directory field. Navigate to the $RTOS_INSTALL_ROOT/pdk_am57xx_1_0_8/packages/MyExampleProjects directory and select the directory that contains the project that you would like to import. Click OK.
- The imported project should now be present in the Project Explorer window. Right click the imported project in the Project Explorer window and select Properties.
- In the General section of the Properties window, open the Main tab and select AM572x - Cortex A15 in the first Variant drop-down menu and AM572X_PHYCORE_RDK [Cortex A] in the second Variant drop-down menu.
- In the same section as step five, select Texas Instruments XDS2xx USB Debug in the Connection drop-down menu. Your project Properties window should now look similar to the following screenshot:

- Click OK.
Your imported project should now be ready to build and debug.
Build the RTOS BSP from Source
This section will explain how to download and build from the RTOS BSP sources. Please note that this is not a required procedure but the steps and scripts to build the BSP from source are offered here for reference.
If you made it this far without first visiting and following the information provided in the Requirements and Development Host Setup sections, please follow those links and return when your configuration meets the requirements and your environment is ready.
Configure Bash as Default Shell
By default, Ubuntu 16.04 uses the Debian Almquist Shell (dash) for calls to the Bourne Shell (sh). This will cause issues in building certain RTOS BSP components as some of Dash's built-in commands do not support all of the required options. To ensure your system uses Bash over Dash for calls to /bin/sh, run this command:
sudo dpkg-reconfigure dash
Select <No> when prompted to use dash as the default system shell (/bin/sh).
Install Additional Host Debian Packages
Building the RTOS BSP from source requires additional packages to be installed. Run the following command to ensure you have the packages installed:
sudo apt-get install build-essential cmake curl doxygen git libboost-dev libloki-dev libtinfo-dev unzip
The above is the recommended package installation for development on a Ubuntu 16.04 LTS Linux distribution. The names of the packages that provide the required software and libraries may differ in other Linux distributions. Also note that these packages are required in addition to those listed in the Install Host Debian Packages section.
Install the Linaro Toolchain
Run the following commands to install the Linaro Toolchain:
wget https://releases.linaro.org/components/toolchain/binaries/5.3-2016.02/arm-linux-gnueabihf/gcc-linaro-5.3-2016.02-x86_64_arm-linux-gnueabihf.tar.xz
tar -Jxvf gcc-linaro-5.3-2016.02-x86_64_arm-linux-gnueabihf.tar.xz -C /opt/PHYTEC_BSPs
rm gcc-linaro-5.3-2016.02-x86_64_arm-linux-gnueabihf.tar.xz
After extracting the toolchain, it needs to be added to the host's PATH to properly use it for building:
export PATH=/opt/PHYTEC_BSPs/gcc-linaro-5.3-2016.02-x86_64_arm-linux-gnueabihf/bin:$PATH
To make this change last beyond your current terminal session, use a text editor to modify your ~/.bashrc file and add the above command to the end of the file.
Install the Repo Tool
The repo tool is used to obtain RTOS BSP sources from Git. Run the following commands to install the repo tool:
sudo mkdir -p /opt/bin

# In the following command, replace <user> with your host's username
sudo chown -R <user>:<user> /opt/bin

curl http://commondatastorage.googleapis.com/git-repo-downloads/repo > /opt/bin/repo
chmod a+x /opt/bin/repo
After installing the repo tool, it needs to be added to the host's PATH to use it for downloading sources:
export PATH=/opt/bin:$PATH
To make this change last beyond your current terminal session, use a text editor to modify your ~/.bashrc file and add the above command to the end of the file.
Git Setup
If you have not yet configured your Git environment on this machine, please run the following commands to set your user name and email address. See here for more information on getting started with Git.
git config --global user.email "your@email.com"
git config --global user.name "Your Name"
git config --global http.sslcainfo /etc/ssl/certs/ca-certificates.crt
Create a Build Directory
A separate directory from the standard install directory is required to build the RTOS BSP from source. Run these commands:
mkdir -p /opt/PHYTEC_BSPs/rtos_ti/build
cd /opt/PHYTEC_BSPs/rtos_ti/build
export RTOS_BUILD_ROOT=`pwd`
$RTOS_BUILD_ROOT is referenced throughout this section. If you use a different directory instead of what is here, be sure to configure this variable accordingly.
Download the BSP Sources
Download the manifest file for the AM57x RTOS PD17.1.x BSP:
cd $RTOS_BUILD_ROOT
repo init -u https://stash.phytec.com/scm/tirtos/manifests-phytec.git -b am57x -m BSP-RTOS-TI-AM57x-PD17.1.1.xml
Download the RTOS BSP sources specified in the manifest file:
repo sync
Start the Build and Install
The RTOS build and install script will download and install components not offered through Git as well as build and install components sourced through the above manifest. Run the following commands to start the build:
cd $RTOS_BUILD_ROOT
./rtos-build-install.sh
By default, the RTOS build and install script will place the built RTOS BSP into /opt/PHYTEC_BSPs/rtos_ti/install. If you would like to place the RTOS BSP elsewhere, export SDK_INSTALL_PATH to your desired absolute path before running the build and install script. Make sure that the path you choose exists and that your user has read and write permissions for that path.
Rebuild the Platform Development Kit After Modification
The Platform Development Kit (PDK) contains the majority of the board and hardware-specific drivers and libraries and, when modified, will need to be rebuilt before use. This section will explain how to rebuild the PDK component of the RTOS BSP.
The phyCORE-AM572x RDK board support library source files are located at $RTOS_INSTALL_ROOT/pdk_am57xx_1_0_8/packages/ti/board/src/am572x_phycore_rdk. This is likely the best place to start when modifying the board support library to suit your needs. Two other locations look into are the chip-support library at $RTOS_INSTALL_ROOT/pdk_am57xx_1_0_8/packages/ti/csl and the drivers at $RTOS_INSTALL_ROOT/pdk_am57xx_1_0_8/packages/ti/drv.
Run the following commands to clean and build the entirety of the PDK:
cd $RTOS_INSTALL_ROOT/pdk_am57xx_1_0_8/packages

# set up the environment for building the PDK
source pdksetupenv.sh

make clean
make all
You can also clean and make individual components of the PDK from the above directory. The following make targets are supported by the included makefile: csl profiling board emac fatfs gpio i2c mcasp mmcsd nimu osal pm spi uart icss-emac nimu-icss pcie sbl usb vps pruss. To clean one of the listed, append _clean to the end of the target component that you want to clean when running make.
Additional Documentation
Texas Instruments offers documentation that can be used as reference or for guidance in effectively using the RTOS BSP:
Texas Instruments Processor SDK RTOS Software Developer Guide