The following will provide instructions for testing a camera on the phyCORE-AM57x RDK using Linux release PD17.1.0. The phyCORE-AM57x RDK provides access to an 8-bit parallel camera at connector X23 which was designed to work with PHYTECs Embedded Imaging phyCAM-P camera. To test the interface, a camera app running from Linux will be used to capture images.
Requirements
The following hardware and software are required to successfully replicate this guide.
- phyCORE-AM572x System on Module (PCM-057)
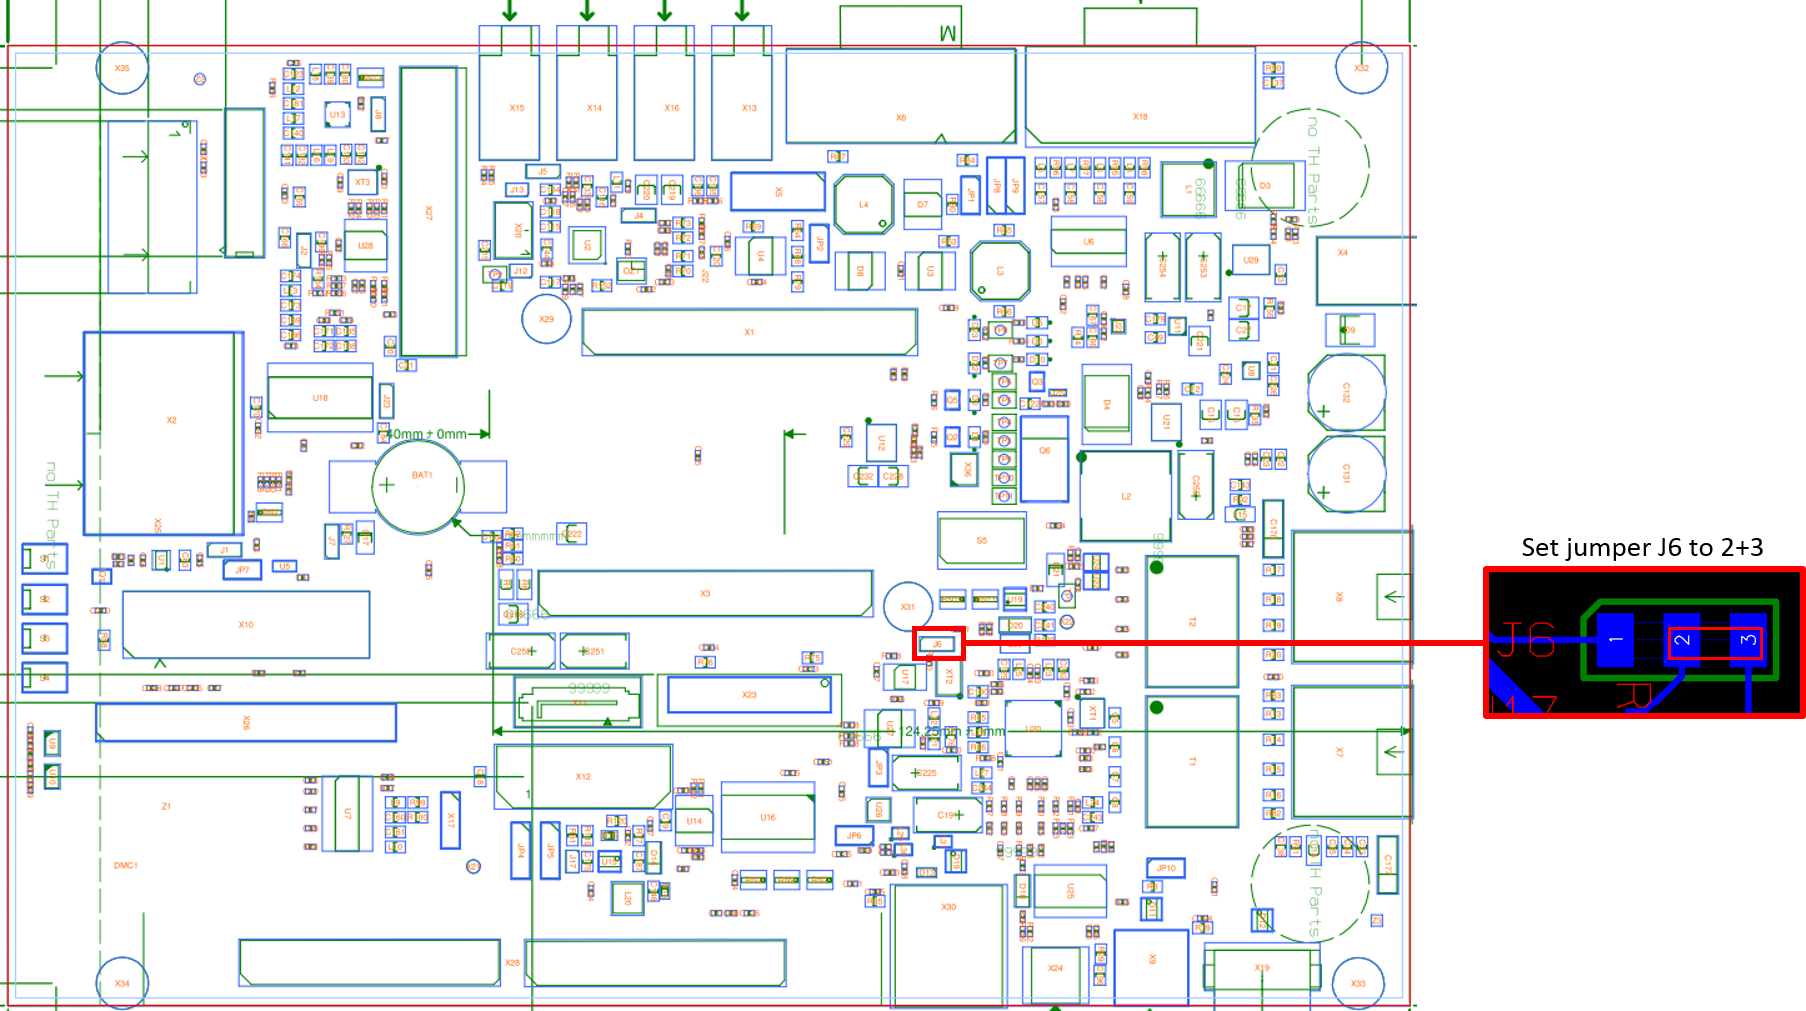
- phyCORE-AM572x Baseboard (PCM-948) with PCB PL1435.3 or newer
Note
Baseboard PCB PL1435.2 can be used if solder jumper J6 is set to position 2+3.
- Display - 7" LVDS capacitive touch used in this example (LCD-018-070KAP).
- PHYTEC phyCAM-P Camera
- PHYTEC parallel camera module with lens mount (VM-009-M12)
- 12 x 0.5 mm (s-mount) lens
- Serial cable (RS-232)
- AC adapter supplying 12VDC / min 2 A
- SD card with BSP PD17.1.0 images or newer. For a link to pre-built binaries or instructions on how to create a card please see the BSP-Yocto-TISDK-AM57xx-PD17.1.0 Release Notes
Hardware Setup
- Connect the phyCAM-P camera to the RDK board. The ribbon cable from the camera module should be connected to X23.
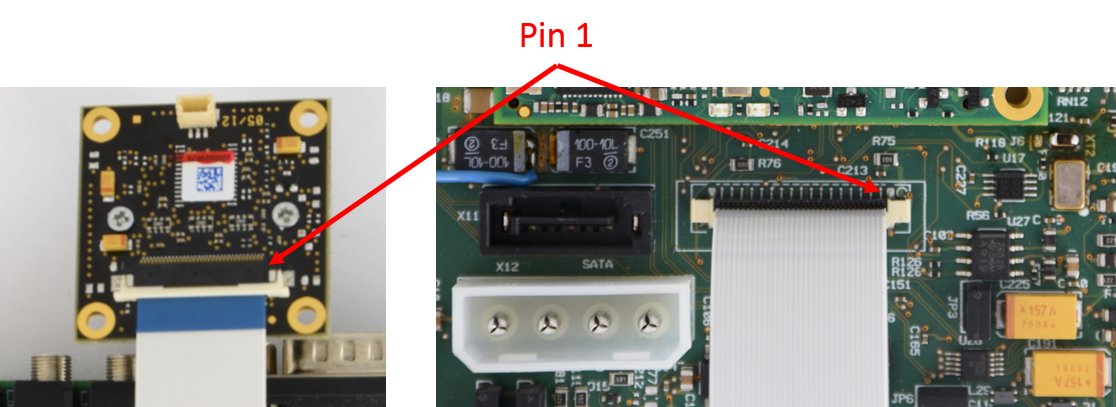
Figure 1: phyCORE-AM572x RDK and camera connection - Connect the display to the RDK board. The display should be connected to the LCD power and data connectors at X25.
- Install the SD card on the RDK board and configure the boot switches (S5) to boot from SD card.
- Connect the kit supplied serial cable from a free serial port on your host PC to the DB9 connector X18 on the carrier board.
- Start your favorite terminal software (such as Minicom or TeraTerm) on your host PC and configure it for 115200 baud, 8 data bits, no parity, and 1 stop bit (8n1) with no handshake.
- Insert 12V power adapter into X4.
- Press the power button (S2) to boot Linux. You should begin to see boot messages on the Linux terminal.
- At the Linux login prompt, enter "root" as the username. There is no required password.
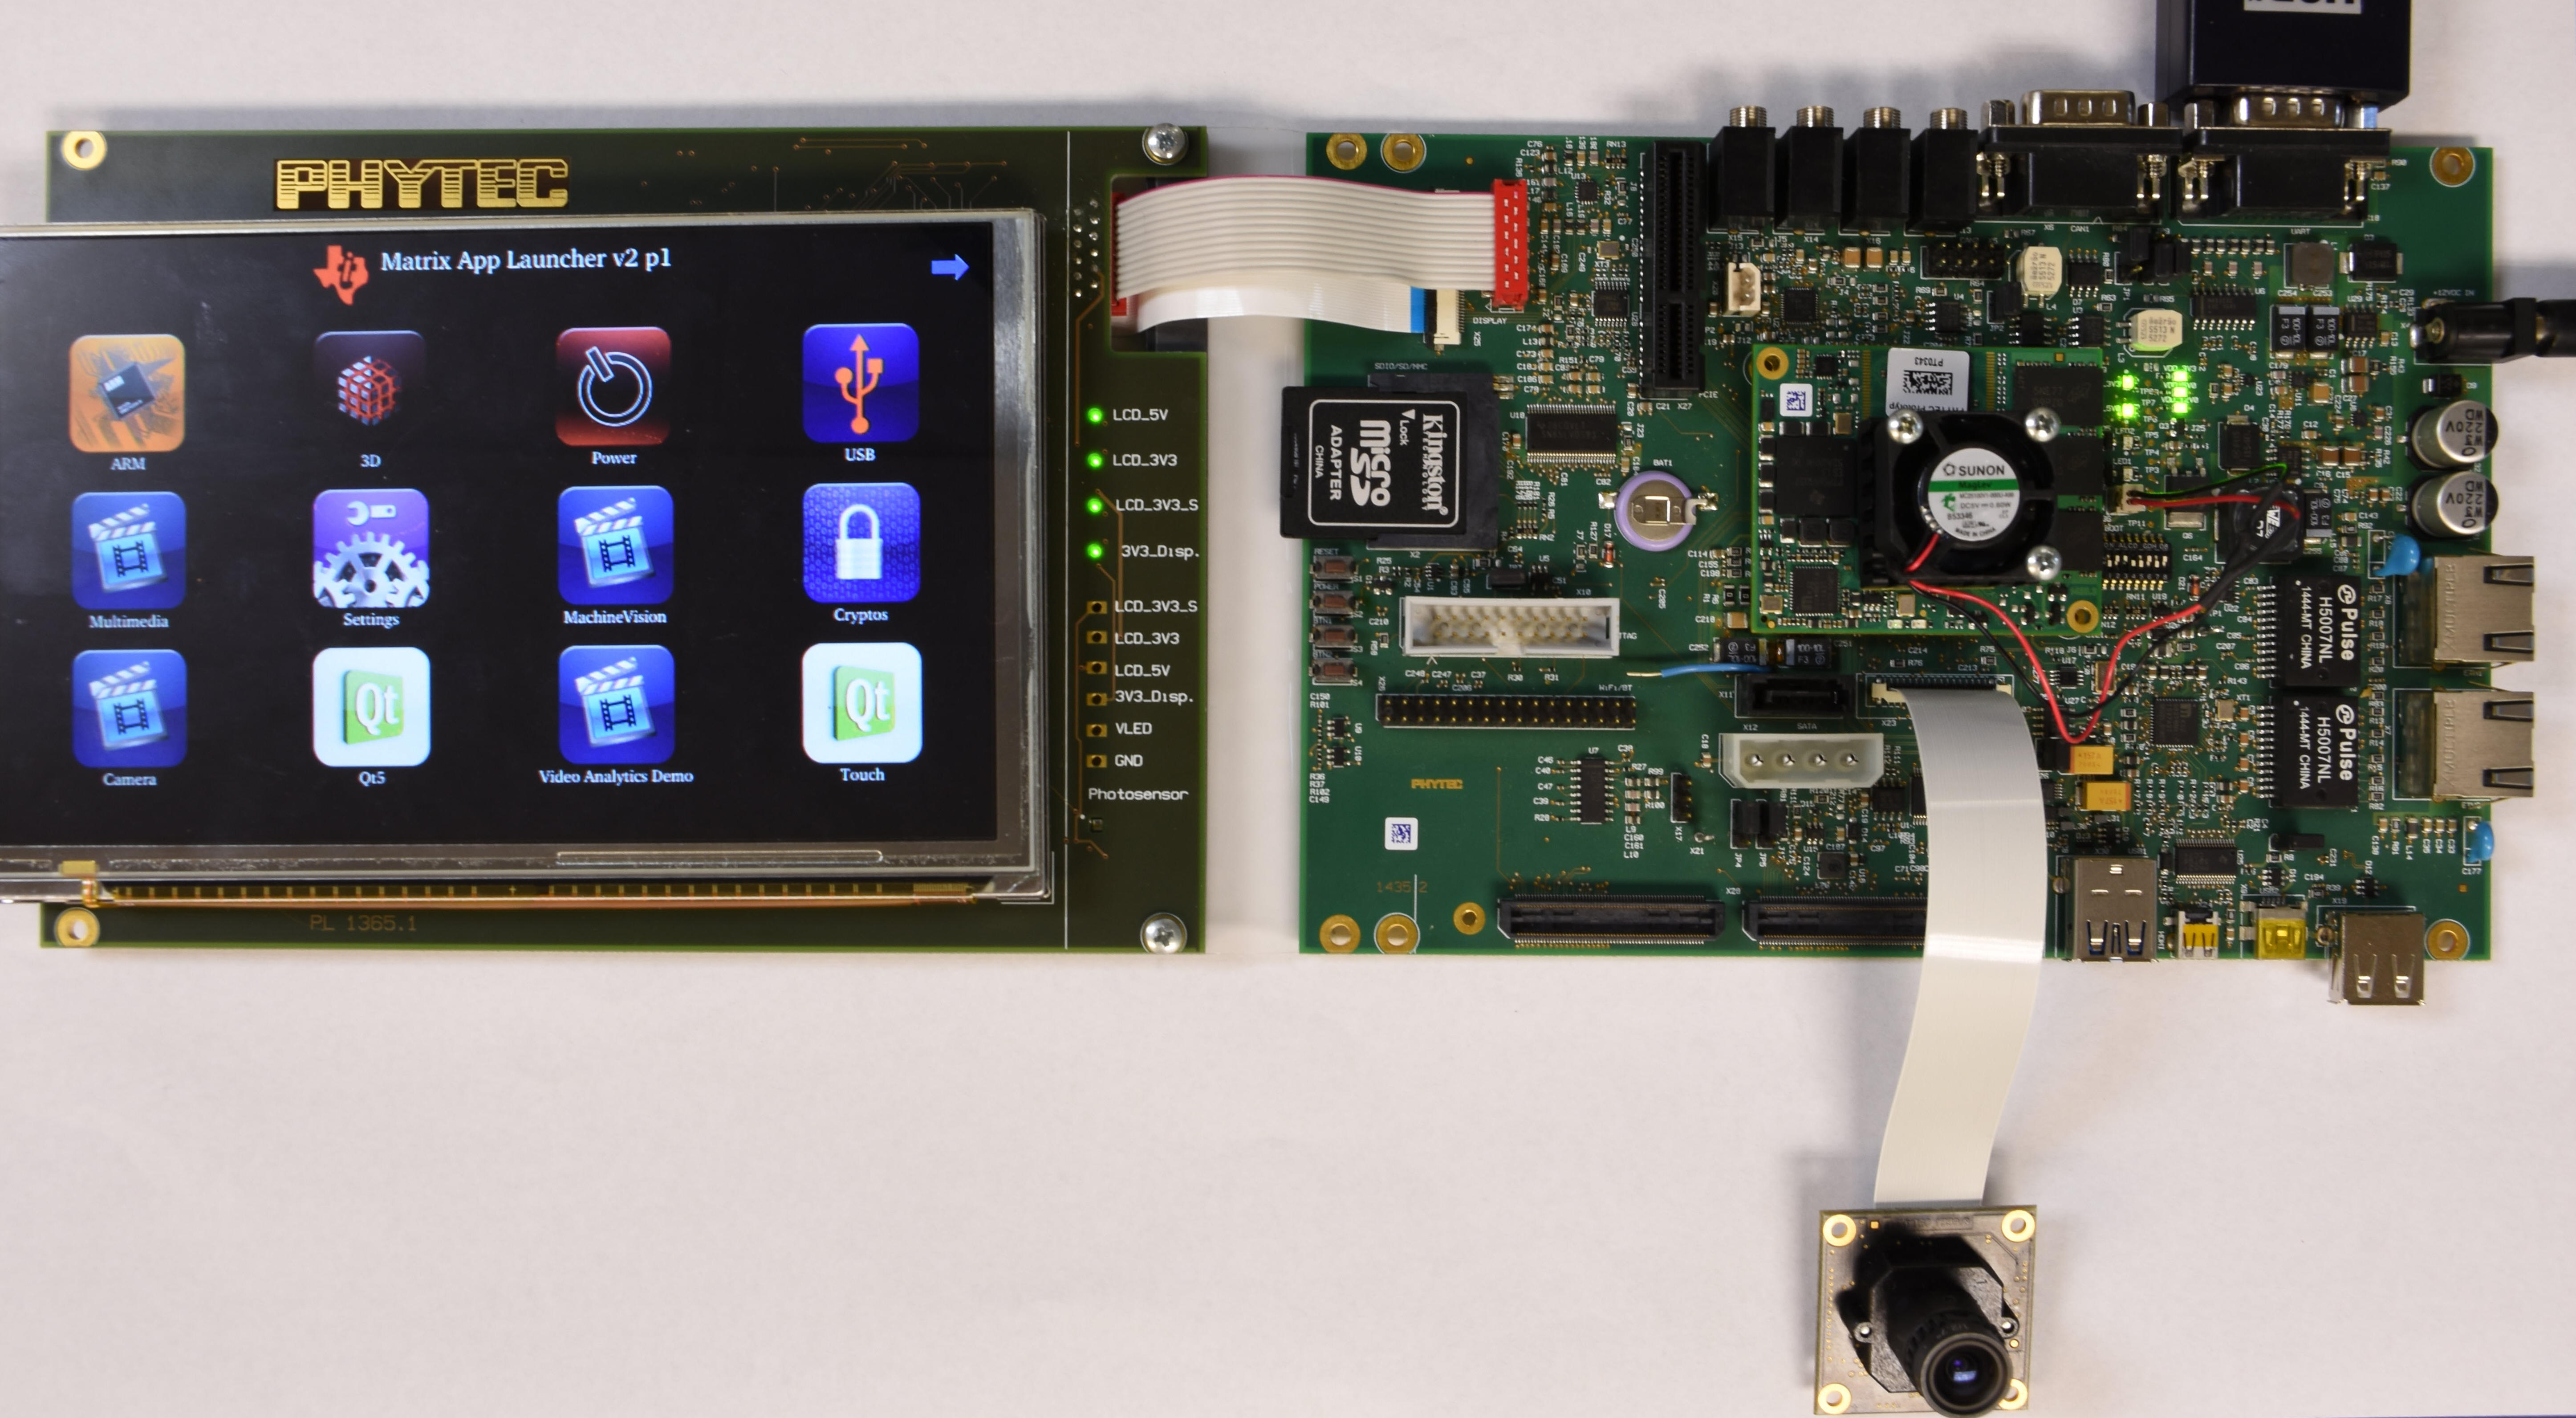
Figure 2: Hardware setup for phyCORE-AM572x RDK camera demo
Image Capture Demo
The pre-built binaries automatically load the Matrix APP Launcher V2 p1 demo on boot. This launcher is an interface to various applications and demos for the phyCORE-AM572x. Once Linux has booted you will see the launcher home screen on the LCD. You can use the touch screen to navigate and open applications.
Using the touch screen, open the camera app, then open the Dual Camera demo and begin capturing images. The Dual Camera demo has been modified to work with the single camera in this example.
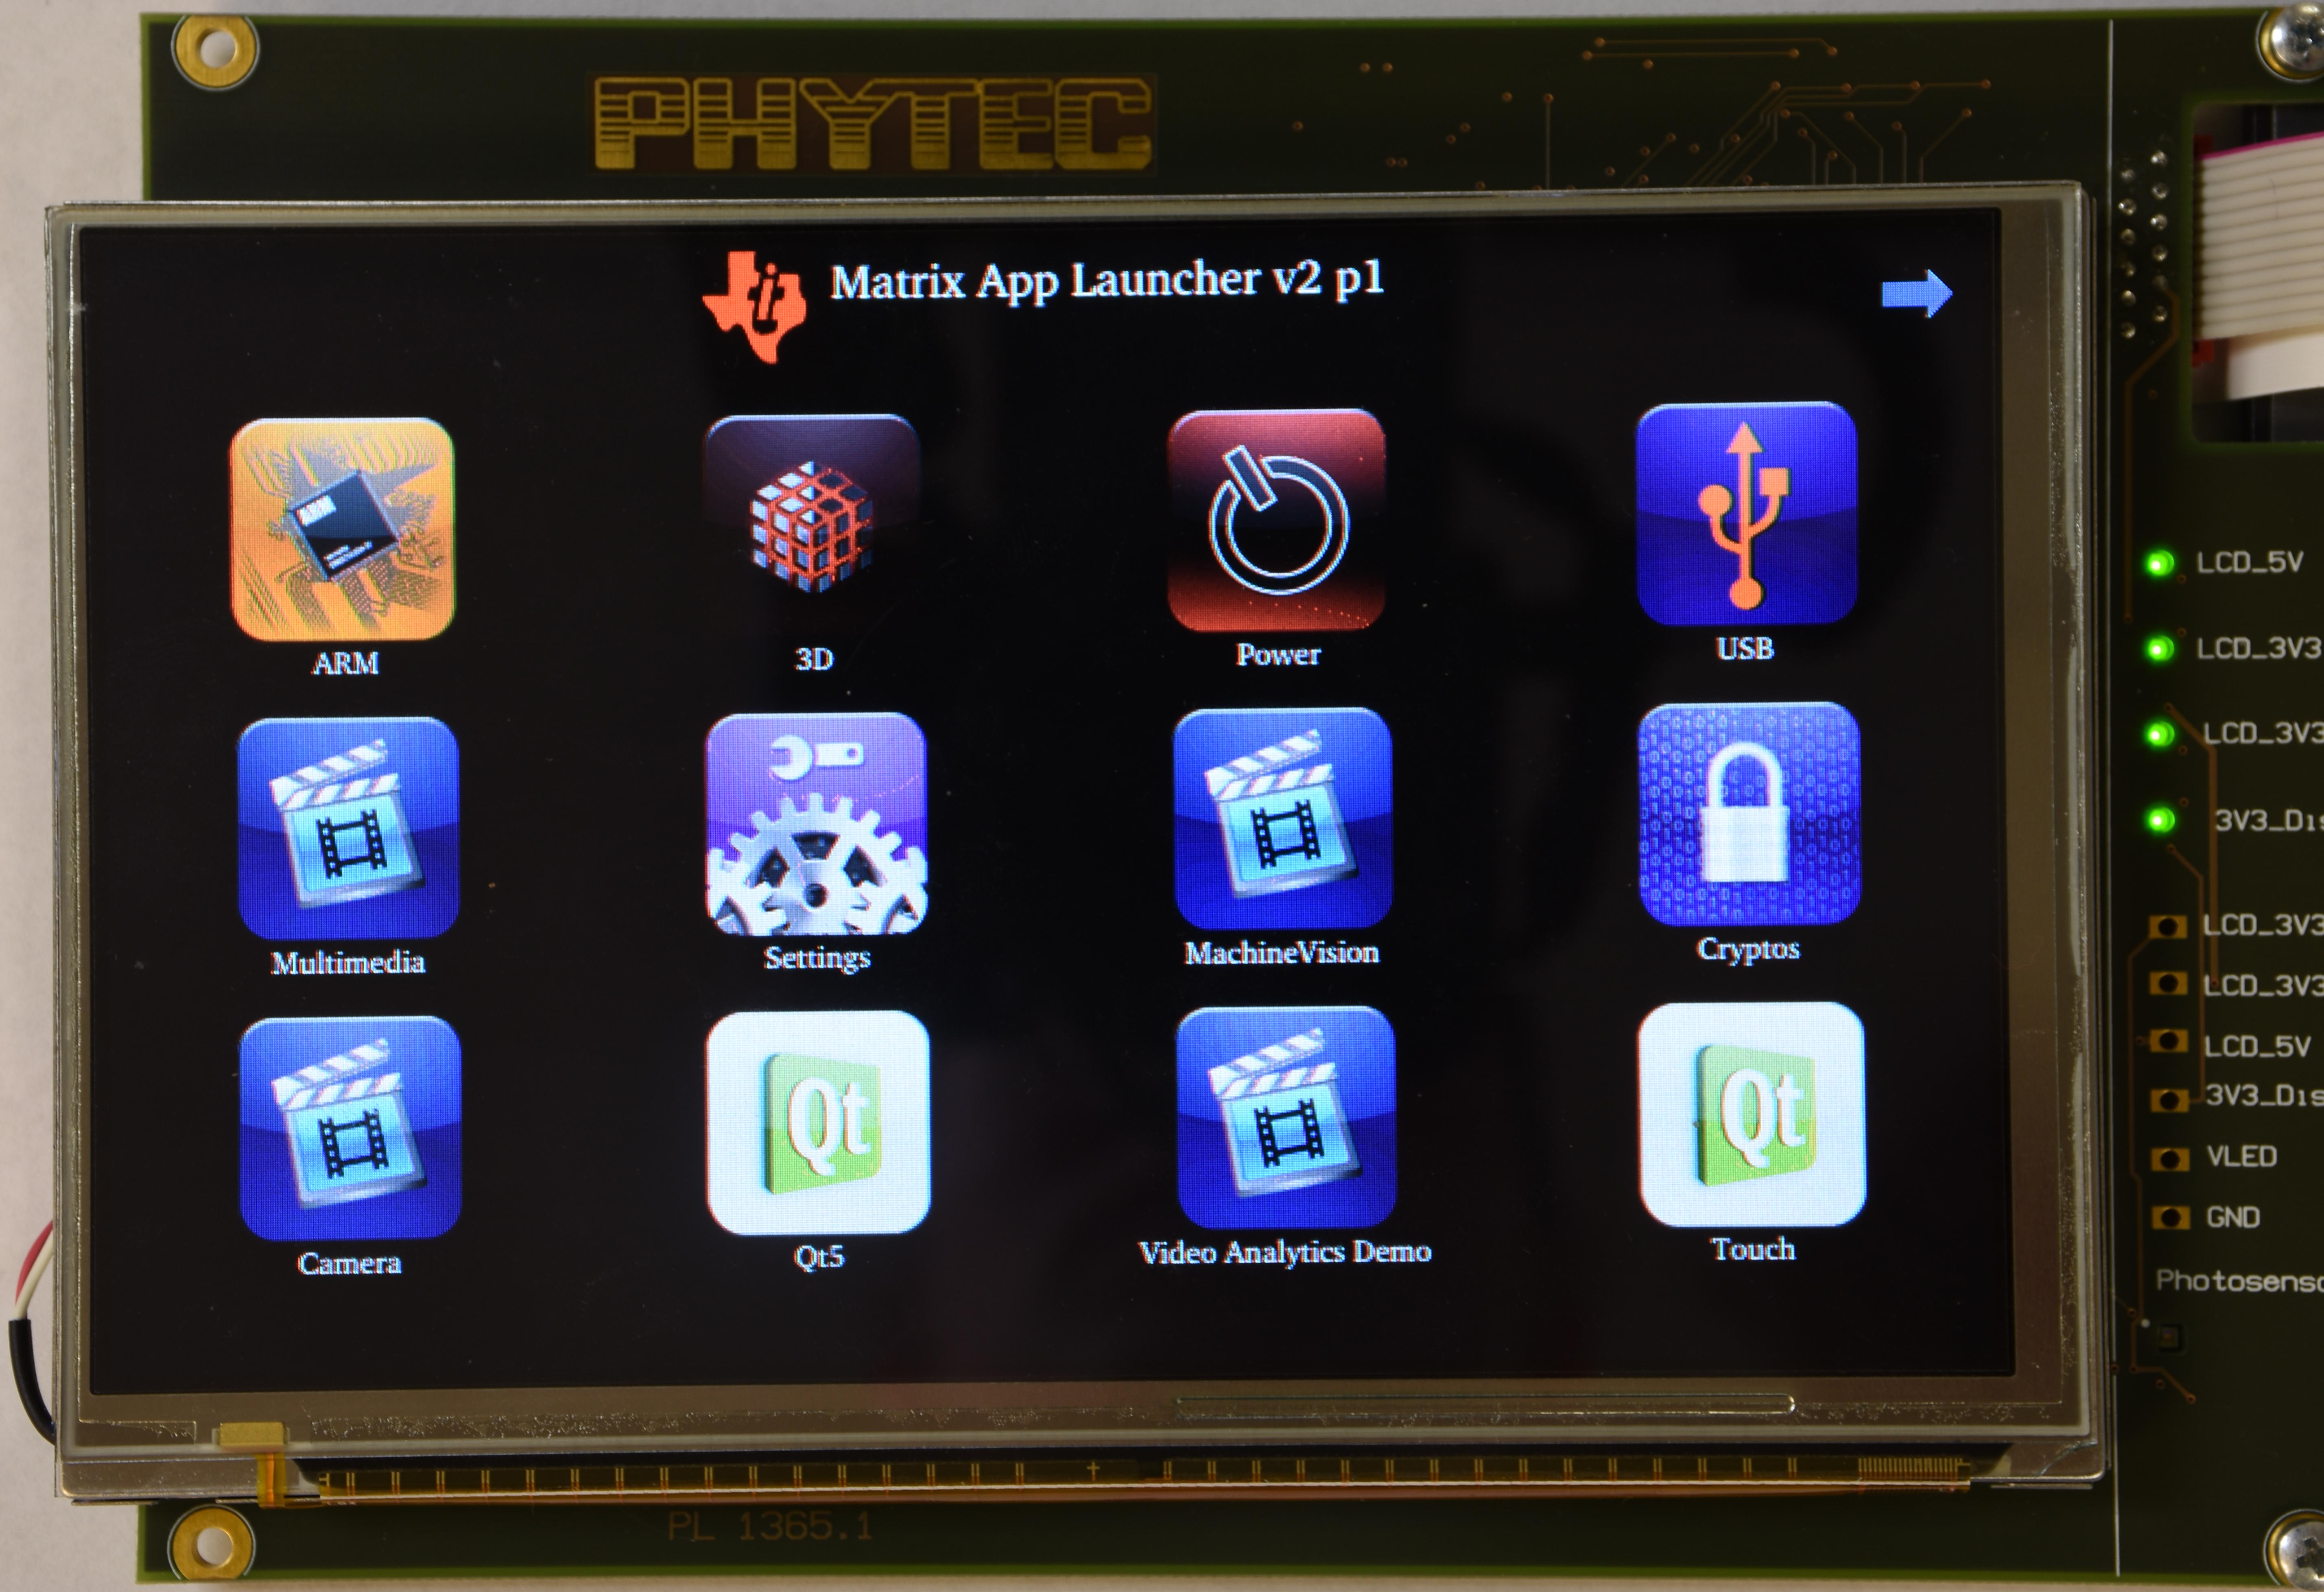
Figure 3: Matrix APP Launcher on phyCORE-AM572x
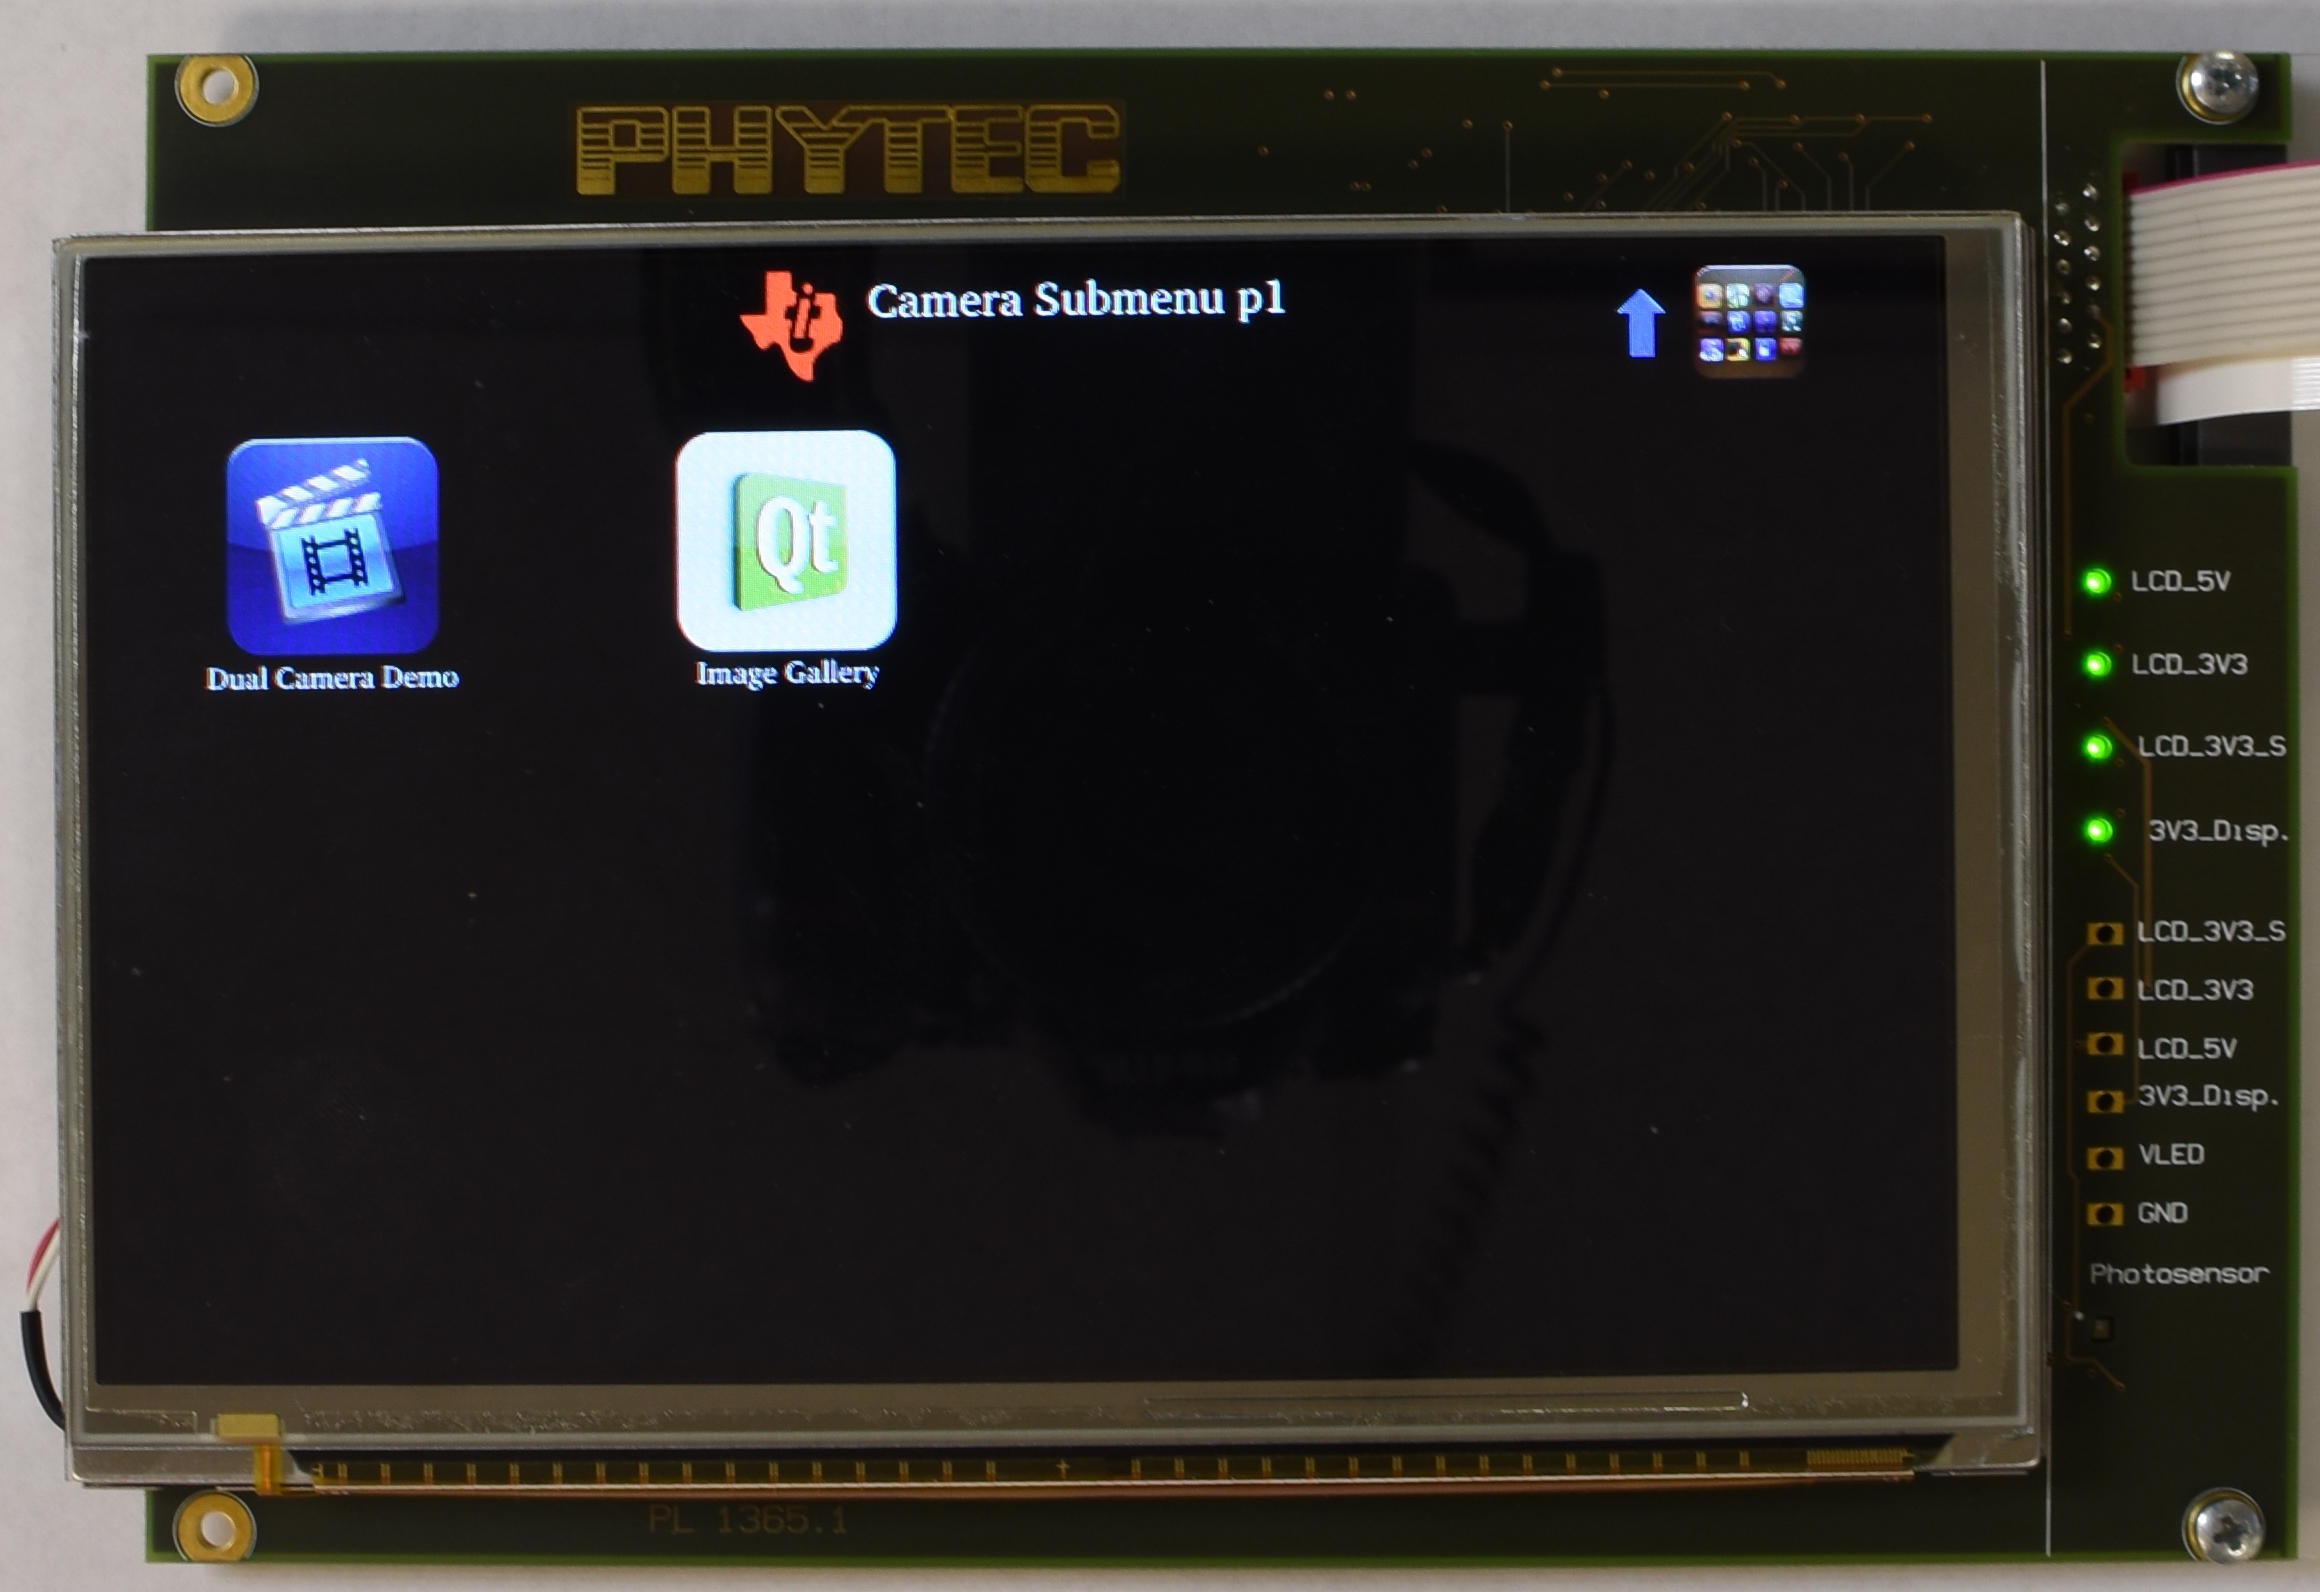

Figure 4: Camera app on phyCORE-AM572x
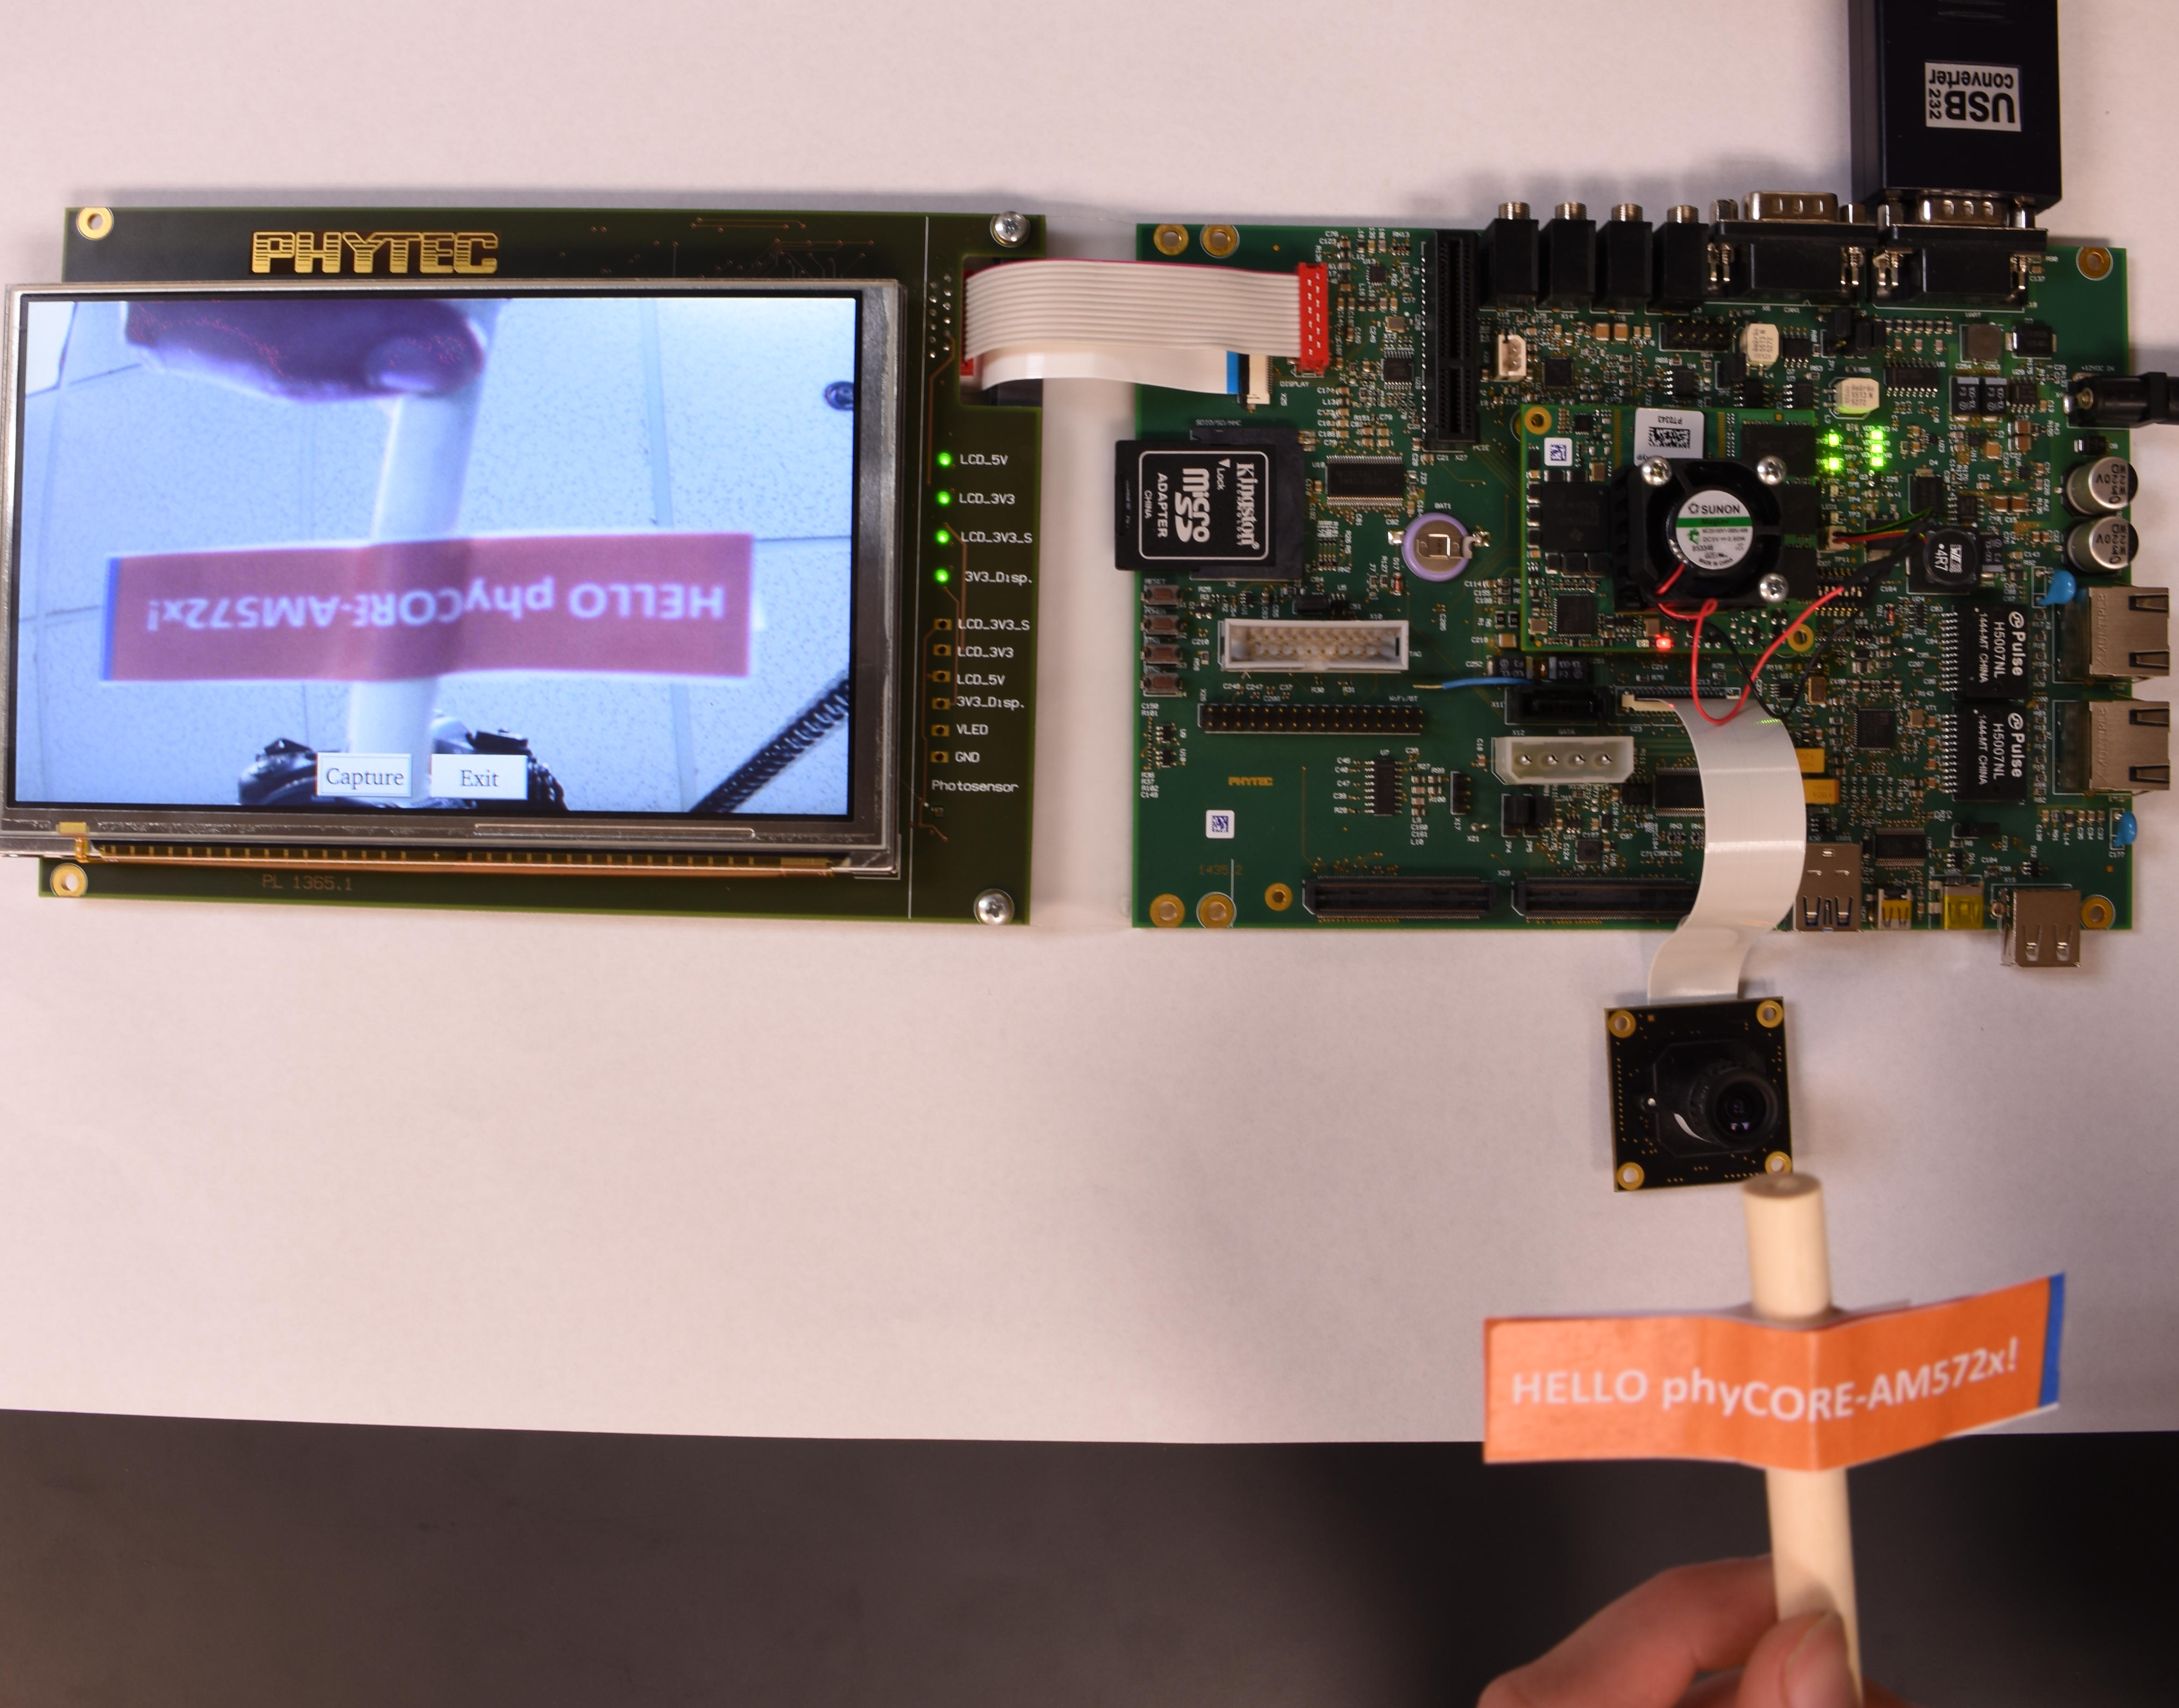
Figure 5: Camera Capture mode example